Whilst this unit is presented as a sequence of five sessions, more sessions than this will be required between sessions 3 and 4. It is also expected that any session may extend beyond one teaching period.
Session 1
This session is about exploring features of mosaic shapes and making a successful poster highlighting the special characteristics of one particular shape.
SLOs:
- Sort mosaic blocks by shape and colour.
- Identify and describe the distinguishing features of mosaic block shapes, using the language of sides and corners.
- Form and express mathematics ideas in poster form, considering audience impact.
Activity 1
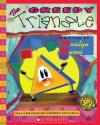
Begin by reading The Greedy Triangle.
Activity 2
Write ‘Clever shapes’ on a class chart. Explain that the students will be making their own small poster about a clever shape. Ask what the purpose of a poster is (To capture people’s attention and to give a short clear message). This could be linked to writing instruction.
Together list the features of a good poster. It grabs the audience’s attention by using:
bold print, a simple and convincing message, interesting colours, a picture or diagram.
Activity 3
Make available mosaic pattern blocks, (omit hexagons), paper, pencils, crayons or felt pens.
- Have students in pairs take a selection of shapes, sort them into groups and explain these using the language of colour or shape. Consider modelling this first, e.g. explaining the colour and number of sides of a triangle as a “think-aloud”. If necessary, revise the shape names using a song, chart, or game. Consider integrating māori kupu for colours and 2D shape names.
- Have each student select one of the shape groups, working with these to come up with a reason for their ‘cleverness’. (For example: ‘they fit together with no gaps’.)
- Record on the class chart the students’ ideas as they each first describe the features of the shape they have chosen, giving the number of sides and corners, and share their creative reasons with the class: for example, ‘circles are clever because they are wheels’, ‘squares are clever because they fit together with no gaps and can be used as tiles’, ‘triangles are clever because they can stand on their heads and fit together’, etc.
Use this time to model and record the language of the shapes, including writing and discussing ‘tessellation’.
Activity 4
Explain that to make their posters, the students will need to draw around their ‘clever shape’ (as many times as necessary).
Set a time limit and have students complete their ‘clever shape’ posters.
Activity 5
Conclude the session by having students share their work in pairs. Display the list of criteria for a successful poster and have students self evaluate, then give partner feedback about each of the criteria. Model how to give and receive feedback with a partner, making explicit reference to the criteria listed.
Activity 6
Share clever shape posters as a class, highlighting geometric language.
Session 2
This session is about understanding that a 2D shape is like a footprint, a 3D shape is something you can hold or feel, and that we use different language for each.
SLOs:
- Understand the difference between 2D and 3D shapes.
- Identify distinguishing features of 2D shapes using the language of sides and corners.
- Identify distinguishing features of 3D shapes using the language of faces, edges, vertex/vertices.
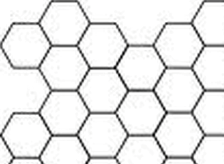
- Explore hexagons, recognising that they tessellate.
Activity 1
- Display the posters from session one. Ask several students to describe the process of drawing around the shape and have them model this on the class chart.
- Explain that what they have drawn is like a ‘footprint’ of the shape. Write the words ‘side’ and ‘corner’ beside these features on each shape outline.
Ask, ‘Can you hold or feel an outline (‘footprint’) with your hand?’ (No. It has only 2 dimensions.). Discuss, highlighting the fact that we can say how long the outline is and how wide it is.
Record ‘width’ ‘length’ ‘dimensions’, explaining why these outlines are called two-dimensional shapes and that this is sometimes referred to as 2D (i.e. because the two-dimensions are width and length).
Ask, ‘What ‘dimension’ can’t we measure?’ (How deep it is.) - Have students write 2D beside their outlines on the class chart, explaining what this means as they do so.
Activity 2
Make available hexagonal mosaic blocks, pencils and paper.
Have students each draw around one block creating an outline, identify and record ‘6 sides’ and ‘6 corners’ and write a statement about the outline. For example: “This is a 2 dimensional or 2D shape because we can only say how long it is and how wide it is.”

Activity 3
- Have students discuss in pairs and decide whether the foam mosaic shape itself is a two-dimensional or three-dimensional shape.
- Have them physically take up positions in the classroom to indicate their thinking (for example: 2D on one side of the mat, 3D on the other).
Discuss, conclude and record that the mosaic block is a 3D shape because it has width, length, and thickness (depth) and we can hold it in our hand. - Have several students draw the foam mosaic hexagon shape (hexagonal prism) on the class chart, capturing the third dimension (thickness) in their own way. Have all students complete this on their own paper.
- Write face, edge and vertex on the class chart. Have students locate and identify each feature on their drawing. Write the plurals of each word beside the singular, highlighting the word vertices. Make the connection between the 2D language of sides and corners and the 3D terms.
Have students label their drawings using these words. Have all students touch and name those parts on their hexagonal mosaic block.
Activity 4
Return to the language listed in Session 1. Highlight the word tessellate.
Pose the task: Use your shape, a pencil and paper and show how you know whether or not a hexagon tessellates.
Activity 5
- Ask students to share their results and talk about why hexagons tessellate.
As they describe their drawings they should use the language of side and corner. - Students form groups of four, tessellating their hexagonal mosaic blocks together. Ask them to locate and identify faces, edges and vertices on the mosaic block, and explain to each other using this language, exactly how the tessellation is formed with 3D objects. (For example, ‘the small rectangular faces around the ‘edge’ of each block are up against each other’, ‘the edges and vertices touch’, etc.) These ideas could be recorded on digital devices for sharing.
Activity 6
Conclude the session by having students each make a small poster, or spoken or digital presentation about 2D and 3D shapes that they know. Encourage them to think about the feedback they received about their posters in Session 1. Model this explicitly.
Session 3
This session is about consolidating understanding of, and using language associated with, 2D and 3D shapes, understanding and making a hollow prism to create a model bees’ honeycomb.
SLOs:
- Recognise that hexagonal prisms make up bees’ honeycomb.
- Understand that the two-dimensional hexagon shape is a plane or face of the three-dimensional prism.
- Make hollow prism shapes and describe their features.
Activity 1
- Begin by displaying a tessellation drawing from Session 2, Activity 4.
Have students explain why the hexagons in the drawing are two-dimensional.
Ask , “What does the drawing remind you of?”
Elicit, ‘a bees’ honeycomb’.
- Display a picture of bees' honeycomb. You could also watch a video about honeycomb, draw on local community expertise, or read a picture book (e.g. The Beeman by Laurie Krebs) to engage students in this context.
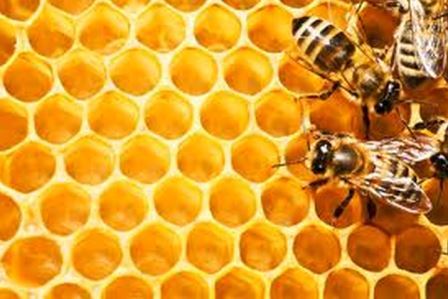
Have students discuss and agree whether the honeycomb is two-dimensional or three-dimensional. Have them explain their thinking. - Write ‘hexagonal prism’ on the class chart and show the students a model.
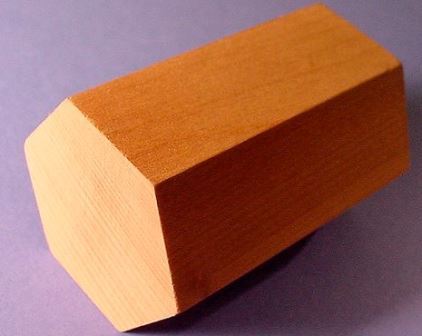
Have several students hold it and describe its features. Record these.
Highlight the plane (two-dimensional) shapes, the hexagon and rectangle that make up the three-dimensional prism. - Have several students make art prints of a hexagonal face and of a rectangular face. You could use ink or paint, and create 3D cardboard stamps. Recognise that these prints are two-dimensional.
- Refer to the chart made in Session 2, Activity 5. Once again have students explain the connection between the 2D language of sides and corners and the 3D terms, in so doing highlighting the fact that plane shapes (2D) build (or make up) 3D shapes.
Activity 2
- Make available rulers, rectangular pieces of card 24cm x 15cm and cellotape.
Pose: Can you work in pairs, using this card and tape, to make a hollow hexagonal prism?
Give students time to explore and create their hexagonal tubes. - Have students suggest how they could make a honeycomb model using their hollow prisms. Fit the cubes together and glue the faces together to create a model honeycomb.
Have students talk about the process using the language of faces, edges and vertices. - Notice and discuss how important it is to be precise in the measurements and their folding, ensuring that their hexagons are regular, not irregular. Define these (e.g. a regular hexagon has six sides that are all the same length, an irregular hexagon has six sides that are of different lengths). You could investigate this further by drawing up a T chart on the board and getting students to draw regular hexagons (by tracing around their hexagonal prisms) and irregular hexagons (by drawing a closed, 2D shape with six sides of different lengths). Alternatively, you could create the T chart and 5 regular and irregular hexagons on a Powerpoint. The students could direct you to drag the different hexagons into the different columns, depending on whether they were a regular or irregular hexagon.
Recognise the bee’s skill in making perfect hexagonal prisms.
If necessary, have students make their prisms with greater precision to achieve a ‘perfect’ honeycomb such as the bee produces.
Activity 3
- Conclude the session by listing student’s questions about bees (including why they use the hexagonal shape for their honeycombs). Ask students to suggest possible answers and record these.
- Suggest they could research this, perhaps with the help of parents or whānau, before the next session.
They might also like to make their own model bees to inhabit the class honeycomb.
Session 4
This session is about giving students opportunities to find and share information about honeybees, their honeycombs and the importance of the hexagon.
SLOs:
- Research and present information about honeybees.
- Recognise that living things have certain requirements to stay alive.
- Recognise that all living things are suited to their particular habitat.
- Recognise that bees always use hexagons because they are ‘perfect in saving on labour (effort and energy) and wax’.
Activity 1
- Have wax or a piece of real honeycomb available. Display the class honeycomb.
Have students share the results of their research and, if any students have made their own model bees, to locate these in the honeycomb. - Together research, read, discuss and list a summary of information about honeybees and their honeycombs. Consider online sources, journal and early reading resources, and videos:
http://www.npr.org/blogs/krulwich/2013/05/13/183704091/what-is-it-about-bees-and-hexagons
http://www.nature.com/news/how-honeycombs-can-build-themselves-1.13398
You may need to structure this task to ensure the engagement and success of your students (e.g. pair up students who would benefit from a tuakana-teina relationship and direct them to research one thing - such as where honey bees live). It may be effective for you to provide the different resources for the students to use in their research, to ensure the language and content is age appropriate and accessible.
Activity 2
Write on the class chart:
What do honeybees need to stay alive?
How does the honeycomb ‘suit’ the bees?
Discuss each, with reference to the research information, and record the students’ understanding of the key ideas.
Recognise that:
- It takes a bee lots of energy to make wax.
- The hexagonal structure is more compact (efficiently and tightly arranged) than any other shape (such as equilateral triangles and squares).
- The hexagonal form of the honeycomb has been shown by scientists and mathematicians to be ‘perfect in saving on energy and wax’, suiting the bees and helping them to stay alive, as their honey (food) is stored.
- It is suggested that the hexagonal cells in the honeycomb begin as circles. The angles of the hexagons are pulled into shape at the point where three cells meet.
Activity 3
Conclude the session by reading A cloak for the dreamer:
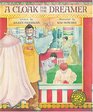
Highlight the way in which the circle shapes which did not tessellate were changed into the hexagon shapes which do tessellate and the way this is like the process in the honeycomb where the cells are thought to begin as circles. Encourage students to share their reflections about this.
Session 5
This session is about synthesising the skills and learning in Sessions 1-4.
SLOs:
- Recognise the ‘cleverness’ of the honeybee.
- Recognise that there are many more ‘clever’ shapes occurring in nature.
Activity 1
Review key learning over the past 4 sessions including referring to the clever shapes posters and feedback in Session 1.
Activity 2
Set an appropriate time limit and have students work in pairs to design and create a ‘presentation’ (poster, powerpoint, other) combining the key ideas about a clever shape and a clever creature (the honeybee).
Activity 3
Challenge students to research other clever shapes (and creatures) found in nature.

Mathematical magic
This unit provides you with a range of opportunities to assess the entry level of achievement of your students.
This unit can be differentiated by altering the difficulty of the tasks to make the learning opportunities accessible to a range of learners. For example:
Some of the activities in this unit can be adapted to use contexts and materials that are familiar to students. For example:
Counting and colours in te reo Māori could be introduced in this unit and used throughout other mathematical learning.
Prior Experience
It is expected that students will have a range of prior experiences working with numbers, geometric shapes, measurement, and data. Students are expected to be able to use simple addition and subtraction in situations where sets are joined, separated, and compared.
Session One
Talk to your students about the purpose of the unit, which is to find out some information about them, so you can help them with their mathematics. In the first session students explore a ‘magic trick’ about dice and extend what they find to develop their own magic trick. Look for your students to generalise, that is, explain why the method works every time.
Dice Faces
Card Sums
In this example below only 5 is odd so the total is 20 + 1 = 21.
Note that students may find variations on a general rule:
The highest sum possible is 25, if all the odd numbers show up. Each time an odd card is turned over one is lost from the sum. The even number is always one less than the odd number. If you see how many even numbers there are you take that number from 25. For example, below there are three even cards, 0, 2, and 8, so the sum is 25 – 3 = 22.
Possible extension:
Suppose you wanted to make the trick look even more impressive by making 10 cards; 0-1, 2-3, 4-5, …,16-17, 18-19.
How could you work out the total without adding all the numbers then?
Session Two
In this session, the theme of mathematical magic is continued as students look for patterns in the place value structure of 100. Begin with a Slavonic Abacus and a Hundreds Board.
Slavonic abacus
Does the student use the tens and ones structure of the abacus or attempt to count in ones?
How many beads are on the whole abacus? How do you know?
If 45 beads are on the left side, how many beads are on the right side?
You might revisit the fact that five tens are fifty. Fifty mean five-ty or five tens.
(Student A), please move some of my kiwi to the left side and cover up the rest so I cannot see them (using an A4 sheet of paper).
Crosses Pattern
In this task students apply place value to explain why a pattern on the hundreds board works every time.
2 + 22 = 24 (top and bottom numbers) and 11 + 13 = 24 (left and right numbers).
Possible extension:
Any square on the hundreds board is magic. The numbers along each axis have the same sum. Why?
Below 12 + 23 + 34 = 69, 13 + 23 + 33 = 69, 14 + 23 + 32 = 69, 22 + 23 + 24 = 69.
Hopefully more able students can see that this works for the same reason that the cross pattern works. For each line, the sum is three times the centre number, with one of the end numbers the same amount more than that number as the other is less.
Other units that will support the development of Place Value at level 2 include:
Session Three
In this session students explore simple two-dimensional dissections in which a shape is cut up into smaller pieces and those pieces are put together to form a different shape. They will need square shaped pieces of paper or card.
Copymaster 1 contains the target shapes. Either provide students copies of the Copymaster or display it on screen. Ask the students to work out how to form each shape using all the pieces from the square. Look for your students to:
Copymaster 2 has some target shapes that can be made by connecting all four pieces. Challenge your students to make each target, record the solution, and make up their own target for someone else in the class. Be aware of the need to check for uniqueness. Is the target really the same as another? This brings in ideas about reflection and rotation.
Can you use these four pieces to create a hexagon?
Session Four
In this session students consider the likelihood of magic happening. Students will consider whether the trick is really magic or if something else is involved.
Am I magic or is something else going on?
Their beliefs might be deterministic: "You are a teacher, so you are clever."
Some beliefs might acknowledge chance: "There are only two cups. You have a good chance of being right each time."
A student might spot that the cups are marked. If not, reveal the trick to them.
Magicians like to disguise their tricks so the two cups might be a bit simple. Let’s try the same idea but have three cups and one treat. Can you figure out a way to get a treat each time?
S: I always choose the position where a treat didn’t go at first.
T: Did that always work? Did anyone else try that idea? What happened? Why do you think that happened?
Other students might always choose a position where a treat was first located, or randomly select a position.
Extend the activity:
You might extend the task by varying the number of cups and treats, e.g. four cups and one, two, or three treats.
Session Five
In this session, students look for repeating patterns and connect elements in the pattern with ordinal numbers.
Let students create their own patterns. Look for students to:
Extend the activity:
There are many ways to increase the difficulty of repeating pattern prediction:
Dear parents and whānau,
For the first week of school our mathematics unit is about mathematical magic. We will investigate number tricks, magically change a square into other shapes, predict the future of a pattern, explain and justify why things work.
Ask your child about their magical abilities and have them share some of the magic tricks they have done in class with you.
Building on two-digit place value
This unit supports students learning to understand the structure of two-digit numbers and how to operate with them.
Session One
Session Two
Session Three
Session Four
Session Five
Our number system is very sophisticated though it may not look like it. While numbers are all around us in the environment, the meaning of digits in those numbers and the quantities they represent are challenging to understand. Our number system is based on groupings of ten. Ten ones form one ten, ten tens form one hundred, ten hundreds form one thousand. And so the system continues to represent very large numbers.
To represent all the numbers we use just ten digits, 0, 1, 2, 3, 4, 5, 6, 7, 8, and 9. The word for digits also comes from our fingers. We don’t need a new number to represent ten because we think of it as one set of hands, one group of ten. Similarly when we add one to 99 we write 100 and do not need a separate symbol for one hundred. The position of the 1 in 100 tells us about the value it represents. Zero has two uses in the number system, as the number for ‘none of something’, e.g. 6 + 0 = 6, and as a place holder, e.g. 704. Place holder means it occupies a place or places so the reader knows the values represented by the other digits. In 500 zero is acting as a place holder in the tens and ones places.
Place value means that both the position of a digit as well as the value of that digit indicate what quantity it represents. In the number 273 the position of the 2 is in the hundreds column which means that it represents two hundred. Seven is in the tens column which means that it represents 7 units of ten, 70.
Renaming a number flexibly is important. In particular it is vital that students understand that when ten ones are created they form a unit of ten, and when ten tens are created they form a set of one hundred. For example, the answer to 210 + 390 is 6 hundreds since one ten and nine tens combine to form another hundred. Similarly when a unit of one hundred is ‘decomposed’ into tens the number looks different but still represents the same quantity. For example, 420 can be viewed as 4 hundreds and 2 tens, or 3 hundreds and 12 tens, or 2 hundreds and 22 tens, etc. Decomposing is used in subtraction problems such as 720 – 480 = □ where it is helpful to view 720 as 6 hundreds and 12 tens.
This unit can be differentiated by altering the difficulty of the tasks to make the learning opportunities accessible to a range of learners. For example:
Some of the activities in this unit can be adapted to use contexts and materials that are familiar and engaging for students. For example:
This unit is targeted at Level 2 so students are expected to have experience at Level 1 including:
This unit builds on the unit Place value with two digit numbers, and it would be useful for students to have worked through that unit first. Some materials created for that unit will also be useful here.
Activity
Session One
In this session the students analyse an abridged game of Snakes and Ladders to determine the gains and losses from climbing a ladder or sliding down a snake.
How many squares would a player gain by landing on the ladder on square 20?
We are now going to look at some of the other snakes and ladders.
How many squares would a player gain or lose by landing on the ladder or snake?
A beans and bags model of 91 – 30 = 61. Putting four beans back gives 65 so the amount taken is 26.
Ask the students to play Snakes and Ladders in pairs or threes - a tuakana/teina model could work well here. Use wooden or whiteboard cubes as the dice, using stickers or whiteboard pens on each face to write on. Copymaster 1 gives the playing boards. Three options of board are available for differentiation. Note that each board requires a different set of numbers to be on the dice. Tell your students to use efficient ways to work out where they will land with each dice roll rather than simply counting by ones. Note that the numbers are slightly different to a standard Snakes and Ladder board - the player moves from left to right across each row rather than zigzagging their way up the board.
After they have played the game for a while challenge your students to work out the gains and losses for each ladder and snake on their board. Expect them to apply the strategies they learned in Part One and record those strategies with numbers, equations or diagrams.
Session Two
In this session students learn to represent two digit numbers using a non-proportional representation, play money (see Material Master 4-9 to make a set of play money. At this point you only need one hundred, ten, and one dollar notes.)
Part One
What is the amount of money that this note is representing? (Holding up $1 note)
Now what happens next?
How do I write this amount of money? ($10 though some students will know about the decimal point).
What happens now? (Adding one $1 note gives ten $1 notes in the ones place that can be exchanged for one $10 note)
14, 24, 34, 44, 54, …, 94, … What happens next?
87, 77, 67, 57,…, 17, … What happens next?
95, 96, 97, 98, 99, … What happens next?
Pay Me is a task in which students make up the pay for employees. You will need:
There are two different versions of Pay Me at varying degrees of complexity:
The task is worked through in groups of three students. One student becomes the banker who exchanges notes and checks the pay envelopes for accuracy. Two students work together on creating the pay envelopes. Copymaster 3 has a set of instructions at the bottom of each page about what amount to start with and instructions about putting a pay slip in each envelope. Students cut out each pay slip and put it into an envelope with the correct amount. You might also ask them to write the amount in words though that can restrict the participation of some students. The Banker checks to see that the amount is correct. Each set of slips has a final question that students should answer to show they have completed the task correctly. Look for:
After the students have completed the task bring them together to share what they learned. You might like to pose other challenges for assessment purposes:
Session Three
In this session the students gain fluency in using ‘up through ten’ and ‘back through ten’ strategies for addition and subtraction.
Each time we make one of these totals our class scores 10 points.
I want you to think ahead about what the total will be when you add a number. Is there a way to always win or is it just good luck? Does it matter who goes first?
Suppose 0, 2 and 7 did not work. How would that change your strategy?
Session Four
In this session the students explore the place value of 3 digit whole numbers, particularly building up tens to make hundreds.
You will need about 500 groupable objects, hopefully still organised into tens and ones. You will need a way to collect ten tens into one hundred. For example, a large kete, ice cream container or bigger ribber bands. You will also need a place value mat (Copymaster 2) enlarged to A3 size.
What number have I made? Make that amount with play money.
If I add one more dollar what happens then? Show me with your play money.
Why does the calculator use a zero here (10)?
I am adding one, two, three,…, seven, eight, nine ones (Count them out as you add them). What is the number now? What happens if I add one? How does the number 19 change when I add one?
Progress in this sequence:
Why does the calculator use two zeros to show 100?
100 → 109 (Why a zero in the tens column?) → 110 (Why a zero in the ones column?) → 150 (Why does the ones digit not change?) → 198 → 200 (Two acts of rebundling or exchanging) → 204 → 214 → 294 → 300 → 305 → …etc.
An issue with the use of zero as a place holder is that the way numbers appear creates an impression that there are no units of a given place value in a number, e.g. 204 has no tens. A flexible understanding of place value is essential for calculation. In particular, knowing that ones are nested within tens, and tens are nested within hundreds is very important. So there are actually 20 tens in 204. This activity helps students rename three digit numbers in multiple ways.
How could I pay for this item with play money?
What if the cash machine only gave out $10 and $1 notes? How could I make $247?
How many $10 notes make $100? How many $10 notes make $200? How many $10 notes make $240? How many extra $1 notes will you need?
Could I make $247 with only one $100 note and $10 and $1 notes? How?
Session Five
In this session students extend their understanding of three digit whole numbers to include ‘breaking up’ of hundreds and tens units.
Use the ‘Modeling three digit numbers’ digital learning object. As with the previous day students work in pairs with a set of play money and a place value mat.
How many tens are in 378? (Students may say 7 which is correct to the place values but there are also 30 tens in 300)
If I added three ones, what would happen? (two added ones would form a set of ten ones that would combine to form a ten unit and move places. Adding another one would result in 381)
If I next added three tens what would happen? (Two more tens would create ten tens which would combine to form one hundred and move places. Another ten more would result in 411)
399 + 1 = 400, 400 + 7 = 407, 407 + 90 = 497, 497 + 3 = 500, …
What would happen if I took seven ones away? (Taking away six ones leaves 420 but to take another one away (click on the down arrow) would require one ten to be ‘broken up’ into ten ones and moved into the ones column. Removing one would leave 419).
What would happen if I took two tens away? (Taking away 19 would leave 400. To take one more away would result in two ‘break up’ actions. One hundred would become ten tens and move columns. One ten would become ten ones and move columns. One would be removed leaving 399).
183 – 4 = 179, 179 – 90 = 89, 89 – 10 = 79,…
302 – 20 = 282, 282 – 100 = 182, 182 – 80 = 102, 102 – 3 = 99,…
All students start with $800 (8 x $100 notes). They take turns to:
The first person to lose all of their money exactly is the winner. They cannot lose more than what they have left.
Dear whānau,
At school we have been learning to add and subtract two-digit and three-digit numbers. Please support your child at home by using junk mail from the letterbox or other advertisements to add and subtract items that are for sale. For example, you could circle 2 or 3 items from a supermarket mailer and your child could explain how to add up the total cost. Or, you could pretend they had $100 to spend at the local market and see how much money they would have left over after buying some items your whānau usually buys.
Paper planes: Level 2
This unit uses the context of making paper planes to develop understanding of metre and centimetre measures. Students investigate a variety of paper airplane designs, experiment to see which planes fly the furthest, and decide winners by measuring and comparing results.
This unit is suitable for students who have had plenty of previous experience with non-standard units and have been introduced to the concept of standard units. It provides an engaging context for practising the use of metres and centimetres. In the second unit, Paper Planes L4, students create scatter plots of the distance their planes travel when a variable is changed.
When students can measure lengths effectively using non-standard units, they are ready to move to the use of standard units. The motivation for moving to this stage follows from experiences where the students have used different non-standard units for measuring the same length. This develops an appreciation for consistency in the units used, and an understanding that such consistency allows for the easier and more accurate measurement.
Students' measurement experiences must enable them to:
The usual sequence used in primary school is to introduce the centimetre first, then the metre, then the kilometre and the millimetre.
The centimetre is often introduced first because it is small enough to measure common objects. The size of the centimetre can be established by constructing it, for example by cutting 1-centimetre pieces of paper or straws. You may also have a supply of 1-cm cubes that could be used to measure objects. An appreciation of the size of the unit can be built up through lots of experience in measuring everyday objects. The students should be encouraged to develop their own reference for a centimetre, for example, a fingertip.
As the students become familiar with the size of the centimetre they should be given many opportunities to estimate before measuring. After using centimetre units to measure objects the students can be introduced to the centimetre ruler. It is a good idea to let the students develop their own ruler to begin with. For example, some classrooms have linked cubes which can be joined to form 10 cm rulers. Alternatively pieces of drinking straw could be threaded together.
The correct use of a ruler to measure objects requires specific instruction. The correct alignment of the zero on the ruler with one end of the object needs to be clarified.
Metres and millimetres are established using a similar sequence of experiences: first construct the unit and then use it to measure appropriate objects.
There are many websites that give instructions for folding paper airplanes or students may like to experiment with creating their own designs.
This unit can be differentiated by altering the difficulty of the tasks to make the learning opportunities accessible to a range of learners. In particular, have students measure length using non-standard measures, such as hand spans or foot lengths, if they are not ready to progress to using metres and centimetres.
An alternative context for this unit is Manu tukutuku – Māori kites. Information about Manu tukutuku is readily available online, and the Te Ara website provides a useful overview. Within this context, students could design and make simplified Manu tukutuku to use for the measurement tasks, with the work culminating in a kite day, rather than an air show.
Getting started
How could we measure the distance our planes fly?
What could we use to measure how far our planes have travelled?
What would we need to be careful of when measuring?
Which of these measuring tools do you think would be best to measure the distance of our plane’s flight? Why?
What other things could we use?
Exploring
Encourage them to record their trials in a table similar to the one below, on paper or a device, to help them keep a track of which planes fly the best. This will help them decide which plane they will use in the air-show at the end of the week. Support students as they work through this process as needed. Students may wish to video their week’s investigation to share with whānau and classmates.
Flight 1
Flight 2
Flight 3
How far did the plane you made today fly?
How do you think you could improve your plane?
What do you think you will try tomorrow?
What did you use to measure the distance of your plane’s flight?
What steps did you take to ensure your measurements are accurate? Encourage use of the language of measurement when students are discussing their measurements.
Reflecting
What was the difference between the first and second place getters?
Which planes went the furthest?
Why do you think they flew so well?
What did we need to be careful of when we were measuring?
Which tools do you think were most useful for measuring? Why?
Dear family and whānau,
This week at school we are making paper planes and measuring how far they can fly. We will be holding an air-show on Friday to see which plane can fly the furthest. Ask your child to show you the design they are using for their plane and help them experiment with things that may make the plane go further. Run some trials at home estimating how far the plane flew each time. You can check the measurements together if you wish. Encourage the use of measuring vocabulary such as estimation, millimetres, centimetres and metres.
Number lines and bead strings
In this unit five-based bead strings and number lines are used to solve addition and subtraction problems. The aim is to get students that use an early additive strategy to solve problems using a tidy number strategy with 10.
There are several things happening in this unit. All of them are aimed at enabling students to become more fluent when working with numbers.
The students need to realise that "making a 10" is a good strategy for solving addition problems. This strategy is reinforced by the use of bead strings and the number line, so students need to understand how these representations work, and see their relevance for addition and subtraction work.
It is important that the students gradually learn to work without the bead strings and number line, so they are encouraged to ‘image’ these objects. Instead of actually using the physical materials, they should start to think about what is happening in their heads. The next stage is for these number facts to become quickly recalled. For most students, this will take a reasonable amount of practice. In the process, students are exposed to problems in context and finally they are given examples of their own to work on.
This unit develops important mathematical thinking that is relevant to learning in school and in contexts beyond the classroom. Firstly, numbers are the base of many ideas in mathematics. It is crucial that students develop fluency in addition and subtraction, and strategies for carrying out number operations. Secondly, devices like the number line are not just useful to understand addition and subtraction, they are also used extensively in coordinate geometry where two perpendicular number lines are used as axes. In this situation they enable us to visualise quite complicated functions. Even at this early stage in school, students are developing skills that will be useful throughout their school life, as well as ideas that will grow into powerful and deep mathematics.
This unit can be differentiated by varying the scaffolding provided and altering expectations. This will make the learning opportunities accessible to a range of learners. For example:
Some of the activities in this unit can be adapted to appeal to students’ interests and experiences and encourage engagement. Consider adapting the addition and subtraction problems in each session to reflect current learning from other curriculum areas (e.g. trips to the marae, swimming lessons, learning about animals). Characters from shared texts can also offer engaging contexts to frame problems in. Other contexts for number line problems include:
Numbers in te reo Māori could be introduced in this unit and used throughout other mathematical learning.
Note the following useful prior knowledge:
Session 1
Kahu the kiwi starts on number eight and walks along four more spaces. Where does she end up? or
Kahu the kiwi starts on number waru and walks along whā more spaces. Where does she end up?
How can we find out where Kahu will end up without counting?
How many spaces will Kahu need to go to get to number 10?
Now how many spaces has she got left to go?
Kahu the kiwi is on number 9 and walks another 4 places, where will she end up?
Kiri the kea is on number 13 and flies backwards 5 spaces. Where does he end up?
Have the students predict where they think they will end up before getting students to come out and share their strategies on the number line.
Kahu has been walking for some time now. She is on number 27 and walks another 5 spaces. Where do you think she will end up?
Ask students to talk to their partner and discuss how they would work the problem out.
Challenge students to see if they can solve the problem without counting on:
See if you can solve the problem another way?
What is the nice friendly number that Kahu is going to pass through?
How far is it from 27 to 30?
Now how much further does she have to go?
Kiri the kea starts on 49 and slides another 8 spaces. Where does he end up?
Tāne the takahe starts at number 87 and wanders on another 8. What number does he end up on?
Session 2 – Marble Collections
Over the next three days the aim is to slowly remove the number lines and bead strings and encourage students to visualise what would happen on the bead string or bead frame. This is called imaging.
Begin by using a bead string 1-20 coloured in 5’s like this.
Where is number 8?
Find number 11.
Where would number 16 be?
Moana has a marble collection. It starts with 9 marbles. Show me where 9 is on the bead string.
Moana is on a winning streak and wins 6 more marbles. How many does she have in her collection now?
Use the bead string to demonstrate putting one marble onto the 9 to make it 10 like this:
9 + 1 = 10; there were 5 left; 10 + 5 = 15.
Kauri has 8 marbles and she wins 6 more. How many does she have now?
George has 15 marbles and wins 6 more. How many does he have now?
Hemi has 15 marbles and loses 6. How many does he have left?
Session 3 – Do and Hide Number line
This session is to use the number line (Copymaster 3) and bead string to solve problems and then the number lines and bead strings are taken away to encourage students to start imaging.
Ask a couple of students to take the number line and pegs away and work out the answer. Ask the students remaining to visualise what the others will be doing on the number line. The following questions may prompt the students to image the number line.
Where did the Tūi start?
How far does the Tūi have to fly to get to 10?
Encourage the students to visualise what they would do on either the number line or bead string. Extend some of the problems to numbers beyond 20.
Start Unknown
? + 4 = 10
Giana the giant wētā jumps 4 more spaces and ends up on 10. What number did she start on?
Change unknown
3 + ? = 8
Tama the tuatara starts on 3 and crawls along the number line and ends up on 8. How many spaces did he go?
Session 4 – Problem Solving Bus Stops
In this session, problems are placed on the top of a large sheet of paper. Students move around each bus stop solving the problem. They record their working on each sheet.
Session 5 – Reflection
Use this session to share the solutions students came up with for each of the bus stop problems. Encourage students to act out the problems where appropriate and to remodel their answers on the number lines or bead strings.
Dear family and whānau,
This week we have been using a number line to do some addition and subtraction. Here is an example of a number line:
Ask your child to show you how they would solve this problem:
Kiri has 5 lollies. If she buys 8 more, how many does she have altogether?
Perhaps you can make up some more problems like that and work them out together. When your child gets really quick at coming up with an answer, put the number line away and ask them to try to figure out the problems by visualising the number line in their head.
Figure it Out Links
An activity from the Figure It Out series which you may find useful is:
Honeycomb
In this unit students sort and explore two-dimensional and three-dimensional geometric shapes, identify and describe their distinguishing features and come to appreciate the efficiency of the tessellating hexagon in meeting the needs of honeybees.
In level one, students have been learning to name some common two-dimensional and three-dimensional shapes and have started to become familiar with their features (e.g. side, corner). When students are given opportunities, they find their own systems for sorting shapes, justifying their categories and developing the important geometric language of attributes.
As they work with three-dimensional shapes, students become aware that these are made up of flat or plane shapes that have two dimensions. It is useful for students to see that two-dimensional shapes are like a print that technically cannot be ‘held’ because it has no thickness or depth. In understanding the way in which two dimensional plane shapes build three dimensional shapes, students need to have a clear understanding of the meaning and concept of ‘dimensions’. They should be able to explain in their own words, what the abbreviations 2D and 3D mean.
The change in language from ‘sides and corners’ for two-dimensional shapes, to ‘faces, edges and vertex/vertices’ is not an insignificant one. The language itself conveys the shape category and should be emphasised and well understood.
As students manipulate shapes that are the same, they ‘discover’ tessellation and come to understand that this is also an identifying characteristic of a shape. It is not expected that they will be able to explain this using the precise quantification of angle.
As shapes don’t exist in isolation it is important that students have opportunities to explore shapes in structures around them. In their exploration of the remarkable structure of the honeycomb, students have opportunities to apply their new learning.
Associated Achievement Objectives
Science
Life processes
Ecology
English
Processes and strategies
Purposes and audiences
Ideas
This unit can be differentiated by varying the scaffolding provided and altering expectations. This will make the learning opportunities accessible to a range of learners. For example:
The context of this unit can be adapted to address diversity, and appeal to students’ interests and experiences to encourage engagement. For example:
Whilst this unit is presented as a sequence of five sessions, more sessions than this will be required between sessions 3 and 4. It is also expected that any session may extend beyond one teaching period.
Session 1
This session is about exploring features of mosaic shapes and making a successful poster highlighting the special characteristics of one particular shape.
SLOs:
Activity 1
Begin by reading The Greedy Triangle.

Activity 2
Write ‘Clever shapes’ on a class chart. Explain that the students will be making their own small poster about a clever shape. Ask what the purpose of a poster is (To capture people’s attention and to give a short clear message). This could be linked to writing instruction.
Together list the features of a good poster. It grabs the audience’s attention by using:
bold print, a simple and convincing message, interesting colours, a picture or diagram.
Activity 3
Make available mosaic pattern blocks, (omit hexagons), paper, pencils, crayons or felt pens.
Use this time to model and record the language of the shapes, including writing and discussing ‘tessellation’.
Activity 4
Explain that to make their posters, the students will need to draw around their ‘clever shape’ (as many times as necessary).
Set a time limit and have students complete their ‘clever shape’ posters.
Activity 5
Conclude the session by having students share their work in pairs. Display the list of criteria for a successful poster and have students self evaluate, then give partner feedback about each of the criteria. Model how to give and receive feedback with a partner, making explicit reference to the criteria listed.
Activity 6
Share clever shape posters as a class, highlighting geometric language.
Session 2
This session is about understanding that a 2D shape is like a footprint, a 3D shape is something you can hold or feel, and that we use different language for each.
SLOs:
Activity 1
Ask, ‘Can you hold or feel an outline (‘footprint’) with your hand?’ (No. It has only 2 dimensions.). Discuss, highlighting the fact that we can say how long the outline is and how wide it is.
Record ‘width’ ‘length’ ‘dimensions’, explaining why these outlines are called two-dimensional shapes and that this is sometimes referred to as 2D (i.e. because the two-dimensions are width and length).
Ask, ‘What ‘dimension’ can’t we measure?’ (How deep it is.)
Activity 2
Make available hexagonal mosaic blocks, pencils and paper.

Have students each draw around one block creating an outline, identify and record ‘6 sides’ and ‘6 corners’ and write a statement about the outline. For example: “This is a 2 dimensional or 2D shape because we can only say how long it is and how wide it is.”
Activity 3
Discuss, conclude and record that the mosaic block is a 3D shape because it has width, length, and thickness (depth) and we can hold it in our hand.
Have students label their drawings using these words. Have all students touch and name those parts on their hexagonal mosaic block.
Activity 4
Return to the language listed in Session 1. Highlight the word tessellate.

Pose the task: Use your shape, a pencil and paper and show how you know whether or not a hexagon tessellates.
Activity 5
As they describe their drawings they should use the language of side and corner.
Activity 6
Conclude the session by having students each make a small poster, or spoken or digital presentation about 2D and 3D shapes that they know. Encourage them to think about the feedback they received about their posters in Session 1. Model this explicitly.
Session 3
This session is about consolidating understanding of, and using language associated with, 2D and 3D shapes, understanding and making a hollow prism to create a model bees’ honeycomb.
SLOs:
Activity 1
Have students explain why the hexagons in the drawing are two-dimensional.
Ask , “What does the drawing remind you of?”
Elicit, ‘a bees’ honeycomb’.
Have students discuss and agree whether the honeycomb is two-dimensional or three-dimensional. Have them explain their thinking.
Have several students hold it and describe its features. Record these.
Highlight the plane (two-dimensional) shapes, the hexagon and rectangle that make up the three-dimensional prism.
Activity 2
Pose: Can you work in pairs, using this card and tape, to make a hollow hexagonal prism?
Give students time to explore and create their hexagonal tubes.
Have students talk about the process using the language of faces, edges and vertices.
Recognise the bee’s skill in making perfect hexagonal prisms.
If necessary, have students make their prisms with greater precision to achieve a ‘perfect’ honeycomb such as the bee produces.
Activity 3
They might also like to make their own model bees to inhabit the class honeycomb.
Session 4
This session is about giving students opportunities to find and share information about honeybees, their honeycombs and the importance of the hexagon.
SLOs:
Activity 1
Have students share the results of their research and, if any students have made their own model bees, to locate these in the honeycomb.
http://www.npr.org/blogs/krulwich/2013/05/13/183704091/what-is-it-about-bees-and-hexagons
http://www.nature.com/news/how-honeycombs-can-build-themselves-1.13398
You may need to structure this task to ensure the engagement and success of your students (e.g. pair up students who would benefit from a tuakana-teina relationship and direct them to research one thing - such as where honey bees live). It may be effective for you to provide the different resources for the students to use in their research, to ensure the language and content is age appropriate and accessible.
Activity 2
Write on the class chart:
What do honeybees need to stay alive?
How does the honeycomb ‘suit’ the bees?
Discuss each, with reference to the research information, and record the students’ understanding of the key ideas.
Recognise that:
Activity 3
Conclude the session by reading A cloak for the dreamer:

Highlight the way in which the circle shapes which did not tessellate were changed into the hexagon shapes which do tessellate and the way this is like the process in the honeycomb where the cells are thought to begin as circles. Encourage students to share their reflections about this.
Session 5
This session is about synthesising the skills and learning in Sessions 1-4.
SLOs:
Activity 1
Review key learning over the past 4 sessions including referring to the clever shapes posters and feedback in Session 1.
Activity 2
Set an appropriate time limit and have students work in pairs to design and create a ‘presentation’ (poster, powerpoint, other) combining the key ideas about a clever shape and a clever creature (the honeybee).
Activity 3
Challenge students to research other clever shapes (and creatures) found in nature.
Dear parents and whānau,
We have been learning that a two dimensional shape is a bit like a footprint, with width and length as the two dimensions, and that other shapes are three dimensional.
Your child would like your help to find out more about the way in which honeybees create hexagonal honeycombs, and to learn more about other ‘clever’ shapes in nature. They will be sharing their information with their peers.
Thank you.