The nzmaths Planning Space allows you to make teaching plans using the resources available on the site. Click on the link beside each heading for further information.
Create a username and login (read more)
To save plans you need to have an account and be logged in. You can log in from the link at the top right of the site.
If you do not yet have an account, click on “Create new account”. You will be asked to choose a username and password and provide an email address. Ensure that you give an active email address as a replacement password will be sent to that address if you forget your log in details.
If you already have an account, enter your username and password to log in. If you have forgotten your password, click on ‘Request new password”. You will be asked for your email address and a new temporary password will be emailed to you.
Create a new plan, with a title and other information (read more)
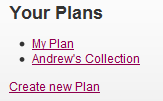
Before you can start collecting resources you need to set up a plan. Choose the Planning Space from the left hand navigation box or the jigsaw on the site homepage. Click on “Create new Plan” to create a plan.
The Create Plan page allows you to enter information about your plan. The only box you need to fill in here is the Title box. You may also want to complete some of the other boxes. This information will appear on the printable summary of your plan. You will notice that the boxes for entering Focus Achievement Objectives (AOs) have an arrowhead symbol on the left hand side and a circle on the right hand side.

If you start typing an AO into one of these boxes it will make a drop down of the AOs with that text for you to select from. You can change the order of the AOs by clicking on the arrowhead and dragging. You can use the “Add another item” button to add extra boxes if you need them.
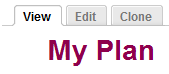
Make sure you click Save at the bottom of the screen before you leave this page. You can always return to this page and make changes. A link to your plan will be available in your Planning Space whenever you are logged in. Click on the name of the plan and then the Edit tab at the top of the page.
Add resources from the website to your plan (read more)
Once you have set up a plan you can add suitable resources from the site to it. You can either add the resources directly into your plan, or search the site and add them.
If you know the title of the resource you can start typing it into the box on your plan. Once you start typing the website will make a dropdown of the resources that include that text in the title. Select the resource from the dropdown to add it to your plan. You can change the order of resources by clicking on the arrowheads to the left of their title and dragging them to their new place.

If you want to search the website for resources there are two ways to do so.
Finding resources using the Resource Finder (read more)
Clicking on Resource Finder in the left hand column of the site will take you to a page with the choices shown below.
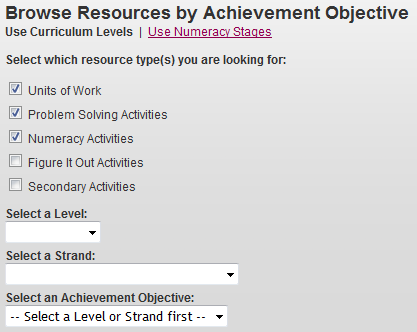
If you prefer to use the Stages of the Number Framework to search for resources you can click on “Use Numeracy Strands”. This will only include Number Knowledge and Number Strategy resources, but will allow you to use more specific learning intentions to search for resources.
This page helps you to find appropriate activities from the Units of Work written for the site, the Problem solving activities, and the Activities from the Numeracy Development Projects books. You can also find teachers notes from the Figure It Out series and resources from the SNP. First choose which types of resource you wish to search (by default the first three are selected). Next choose from the dropdowns either the curriculum level or strand (or both) that you want activities from. If you wish to be even more specific you can choose a specific Achievement Objective from the New Zealand Curriculum.
Once you have chosen from these dropdowns you will be shown brief summaries for the resources on the site relating to your choices. Clicking on the titles of the resources will take you to that resource on the website. Rather than leaving the search page you may prefer to ‘right click’ on the titles and open them in a new window or a new tab in your browser. The colour of the title block of the activities tells you the strand that activity relates to. Blue represents Number and Algebra, pink represents Geometry and Measurement and yellow represents Statistics. Activities with green title blocks are problem solving activities.

At the bottom of each resource you will find a list of similar resources that you may also want to look at. Just above this list you will find a dropdown with the title “Add this resource to one of your plans:”. To add the resource to your plan, simply select that plan from the dropdown.
![]()
Finding resources by browsing the website (read more)
It is not necessary to use the Resource Database to search for resources. If you prefer to browse the website instead, click on “Units of work” in the left hand column of the site.
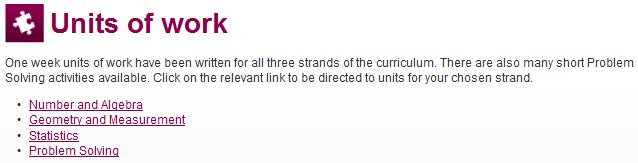
You can click through this section to find resources that you may wish to use. You can add these resources to you plan by using the dropdown at the bottom of the resource.
The search box at the top of the left hand column of the site allows you to search by any text that may be in the resource.
Printing your plan (read more)
You can print a copy of all of the resources in your plan by clicking on print at the bottom of the left hand of the page. If you click on this link you will print a single file which contains a summary table of your plan as well as the teachers’ notes for all of the resources in your plan. If you only want to print the summary table, print only the first page of this file.
Many of the resources on the website have printable copymasters. You can download a zip file of all of the attachments for the resources in your plan from the link at the bottom of your plan.
![]()
Sharing your plan with others (read more)
If you would like other people to be able to access your plan you can simply send them the url (website address) from your browser. Alternatively, you can click on the link saying “Email to friend” below the Print link. This will allow you to automatically send a link to that page to any email address you choose.